
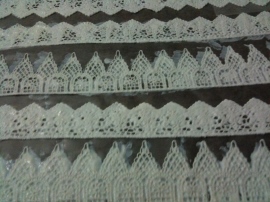
Alright – tutorial time!! This post is going to be about one of the cutest, most fun, and extremely necessary things… CROWNS. There are several types of crowns I make, but for THIS tutorial we’ll be talking about those cute little lace crowns you may have seen floating around the internet world. Here’s a few of what I am talking about:


Things you’ll need:
- fabric lace
- modge podge
- metallic paint (or whatever color you want to make your finished crown)
- any embellishments for final crown
- wax paper
- scissors
- ruler/measuring tape
STEP 1

Buy lacey fabric ribbon!
I got mine from my local fabric store, Joann’s, it was quite awhile ago so I don’t remember the exact price, but I know it was fairly cheap, less than $10 for enough to make 4 or 5 crowns, depending on size.
STEP 1.5
Buy modge podge (other types of glue or fabric stiffener would probably work, but I’ve never tried… feel free to try and let me know)! Also get some good metallic paint… not spray paint… or kiddie paint. Get the kind of paint that smells dangerous for your lungs… that’s the good stuff and will really keep a shimmer instead of just a gray tint.
STEP 1.75
Call home to see if you have wax paper… if not, stop at a store and buy some.
STEP 2
Go home… and on your way, ponder who you are making the crown for.
STEP 3

By now you hopefully figured out who you are making the crown for. If the person or child is nearby, measure their head… if not, google how big their head might be according to their age… or just wing it if you live life on the edge. Cut out your fabric lace to the desired size, and add anywhere from .5–1.5 inches for overlapping.
Your hands will get gross in the next step, so also prepare some wax paper.
STEP 4

Fill a bowl with modge podge! This is the fun part 🙂 Take all the lace you have cut so far and throw it in the mixing bowl. You kinda have to eye how much modge podge based how many crowns you’ve got. Mix, mix, mix! You will have to use your hands here (this part will be fun to do with some kids)… because you’ll want to specifically rub the modge podge into the fabric so that it totally is immersed into the soul of the crown! If it just covers the surface, it will be flimsy and not very royalty-like.
STEP 5
Once you have sufficiently baptized your fabric lace with modge podge, take it out and carefully use your fingers remove excess glue. If you skip this step, the precious little holes in the fabric lace will be filled with modge podge, and when it dries, and after it’s painted, will look not as cool as it could.
STEP 6
Lay out on wax paper. I honestly don’t remember how long it took to dry… but I know it was a while (48 hours perhaps). Don’t plan on using it for a few days.
Periodically (every half hour, or maybe every hour) carefully lift and turn over your crowns to prevent the holes from being filled in with glue.
STEP 7
When it is finally dry, whip out your metallic paint and paint away! Use as nice of a paint brush as you can. Any cheap ones will leave the bristles in your crown and look awkward. This step will take long, once again, as you may want to do several coats of paint, depending on your style, and can only do one side of the crown at a time.
STEP 8

When once again dry, now you can glue it into the shape of a crown. Try your best to overlap the patterns so it’s a seamless as possible. I use hot glue to glue the ends together because I have no patience to sit there and hold the crown together until it dries…
STEP 9
Now you can add any embellishments, or none at all! You can add any cute or fancy ribbon around it, adorned with a precious flower, tulle, or pearls, and you are good to go.
STEP 10
Find the person you made it for, crown them, show them to a mirror… and enjoy 🙂

